
Original browser-game strategy center
Smash Fest Walkthrough — Detailed Guides & 100-Level Strategy Center
Welcome to the official Play Smash Fest walkthrough and strategy headquarters. Every level layout on this site is deterministic and hand-crafted: target placement, mass distributions, friction coefficients, ammunition limits, and par thresholds are derived directly from the game's physics engine data.
Rather than superficial video transcripts, our written walkthroughs provide actionable structural analysis. You will learn how to identify load-bearing pillars, trigger cascading mass transfers, wait for physics settling, and recover when debris fails to clear the table cleanly on the first shot. Detailed photo-guides are provided for foundational levels, paired with comprehensive strategic blueprints across all 10 chapters.
Complete Step-by-Step Level Breakdowns
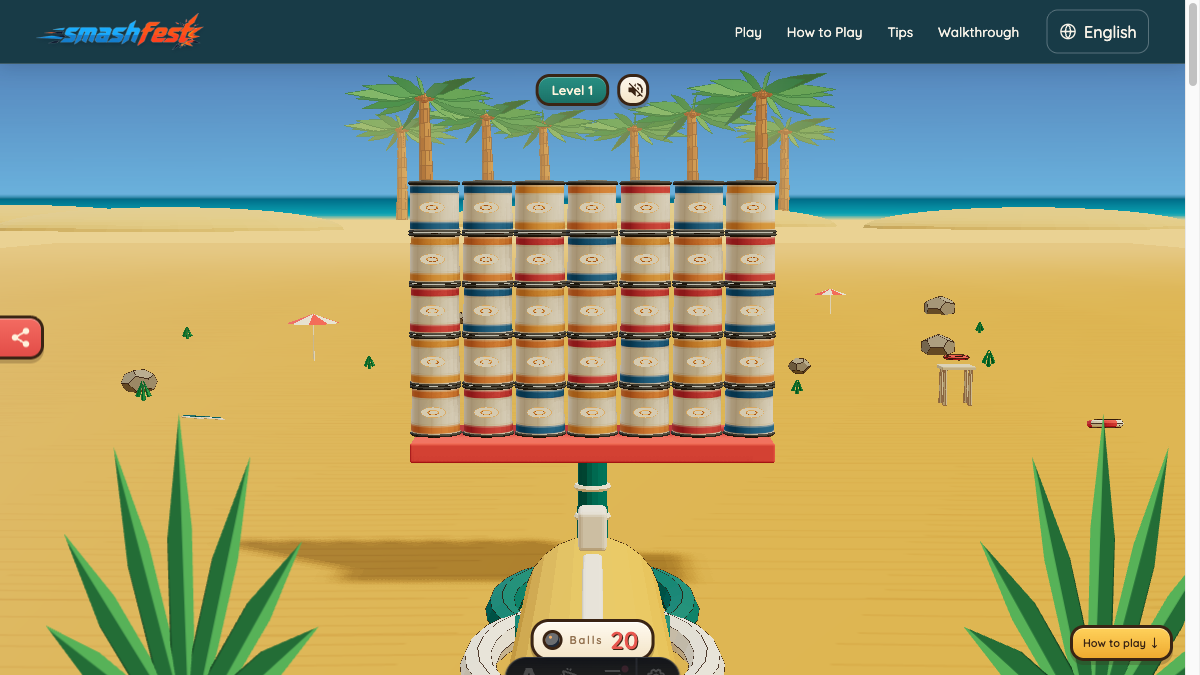 Smash Fest Level 1 Guide — Clear the Tin WallOriginal written guide · real game screenshotRead the English guide →
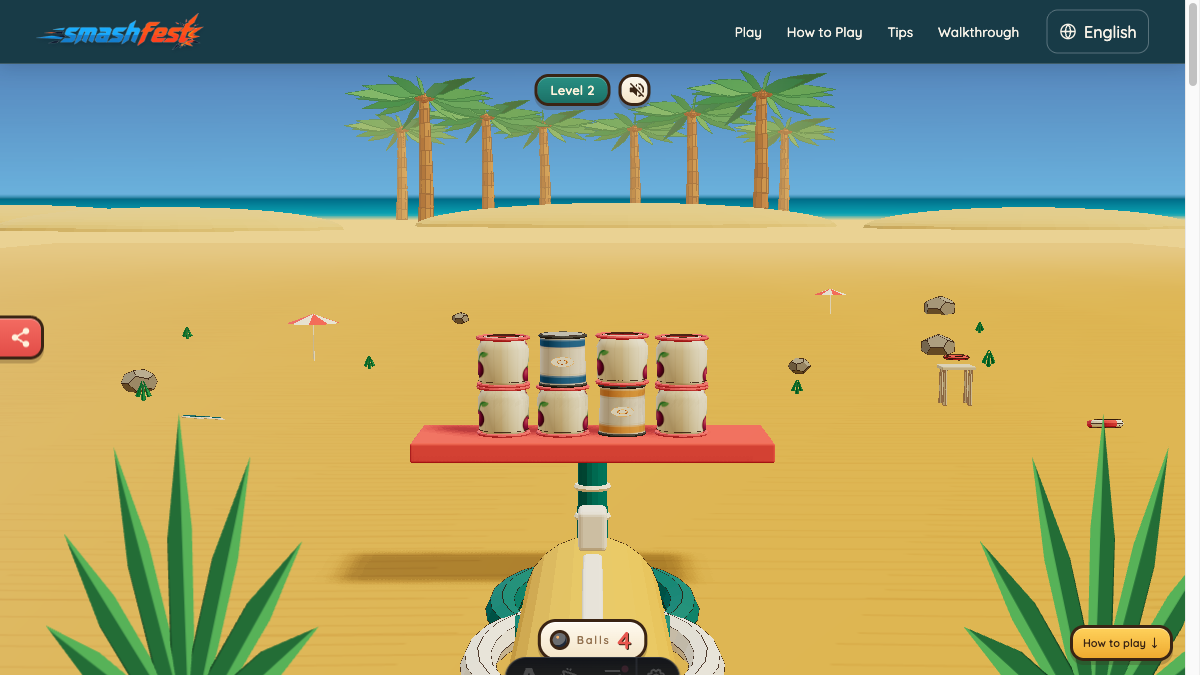 Smash Fest Level 2 Guide — Two-Shot Mixed Wall PlanOriginal written guide · real game screenshotRead the English guide →
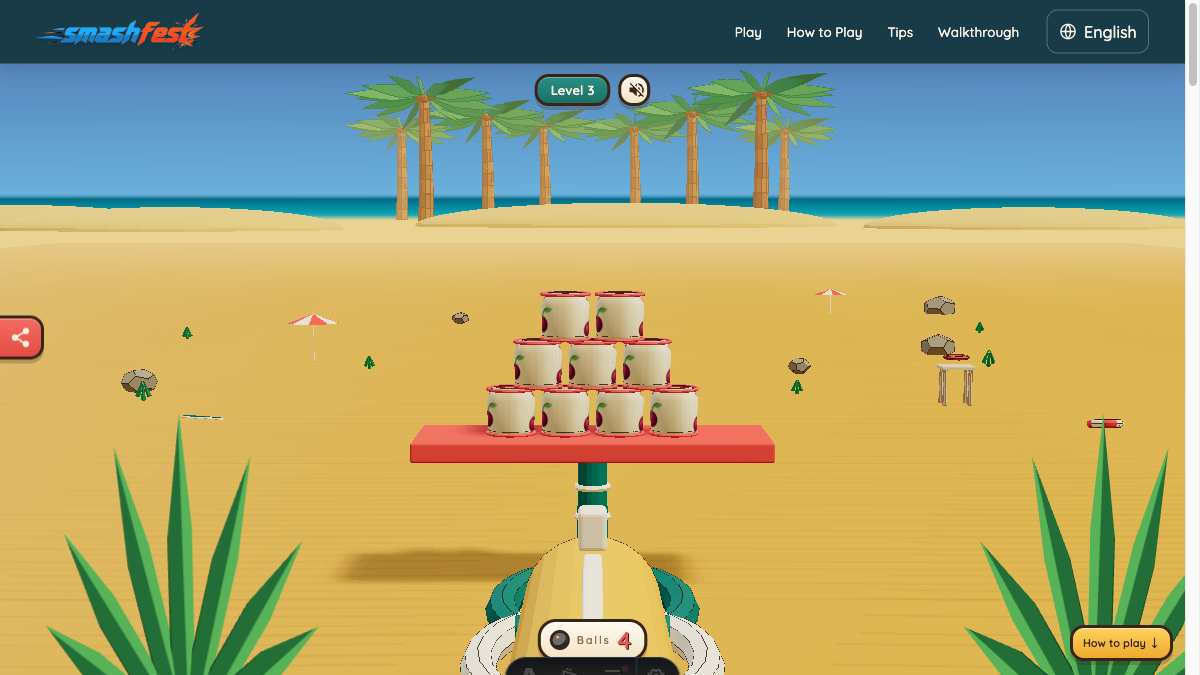 Smash Fest Level 3 Guide — Glass Pyramid Side AttackOriginal written guide · real game screenshotRead the English guide →
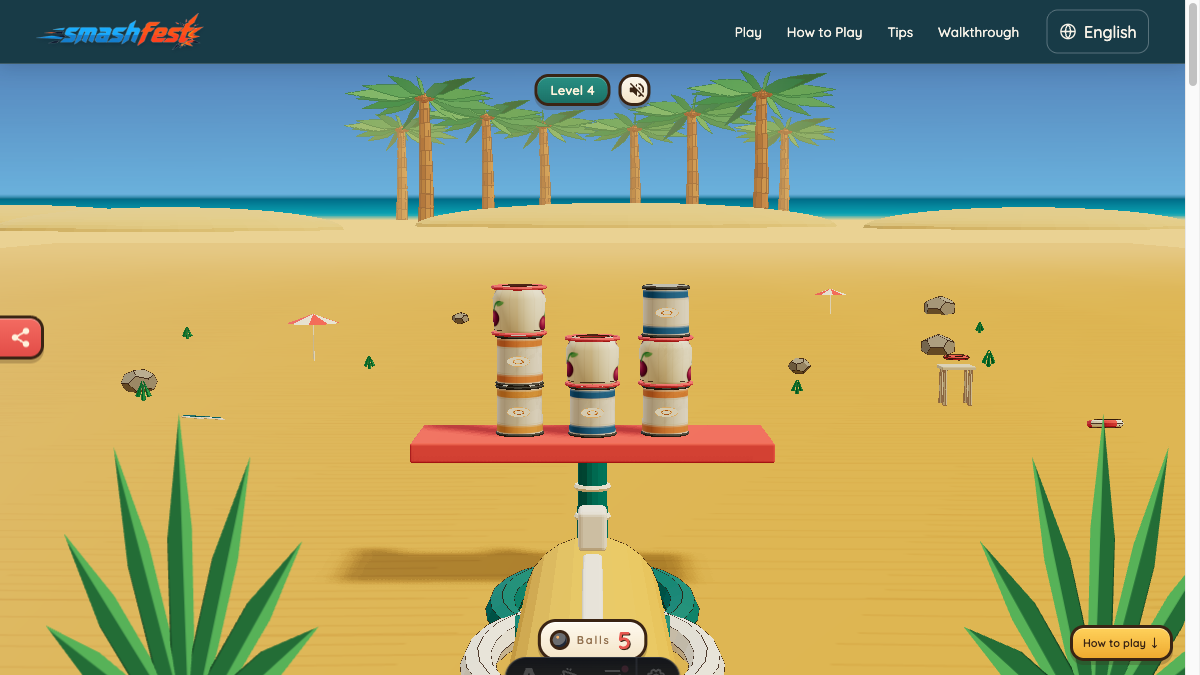 Smash Fest Level 4 Guide — Trigger a Two-Tower CascadeOriginal written guide · real game screenshotRead the English guide →
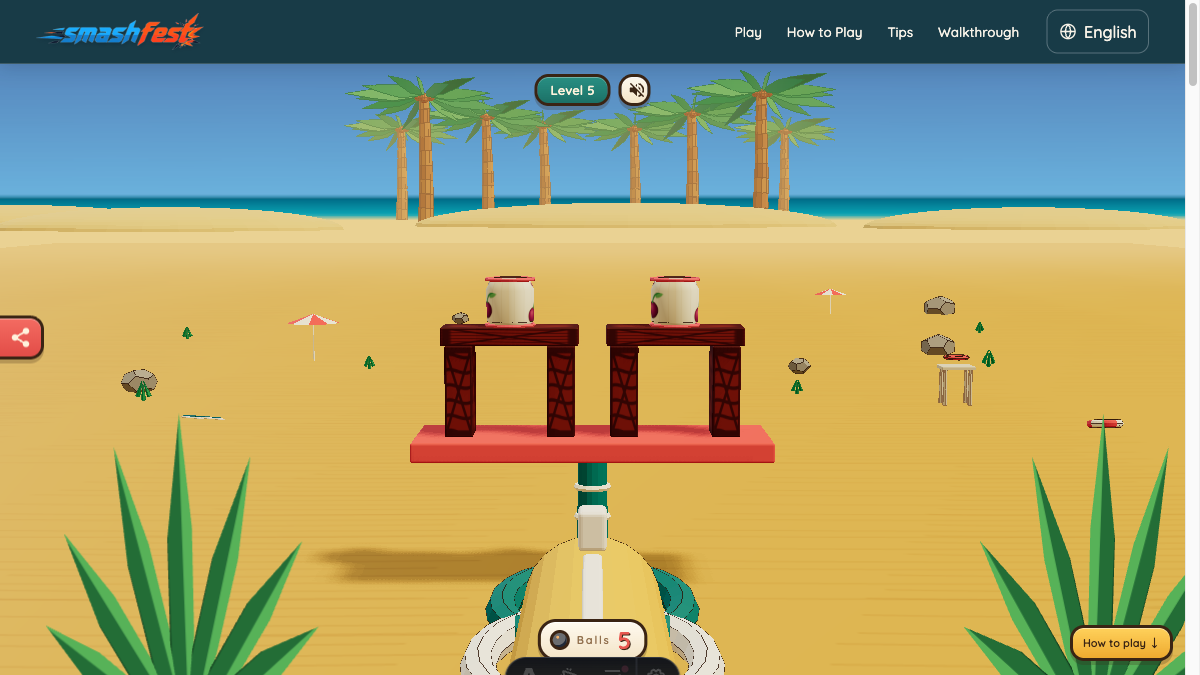 Smash Fest Level 5 Guide — Remove the Glass-and-Wood Arch SupportOriginal written guide · real game screenshotRead the English guide →
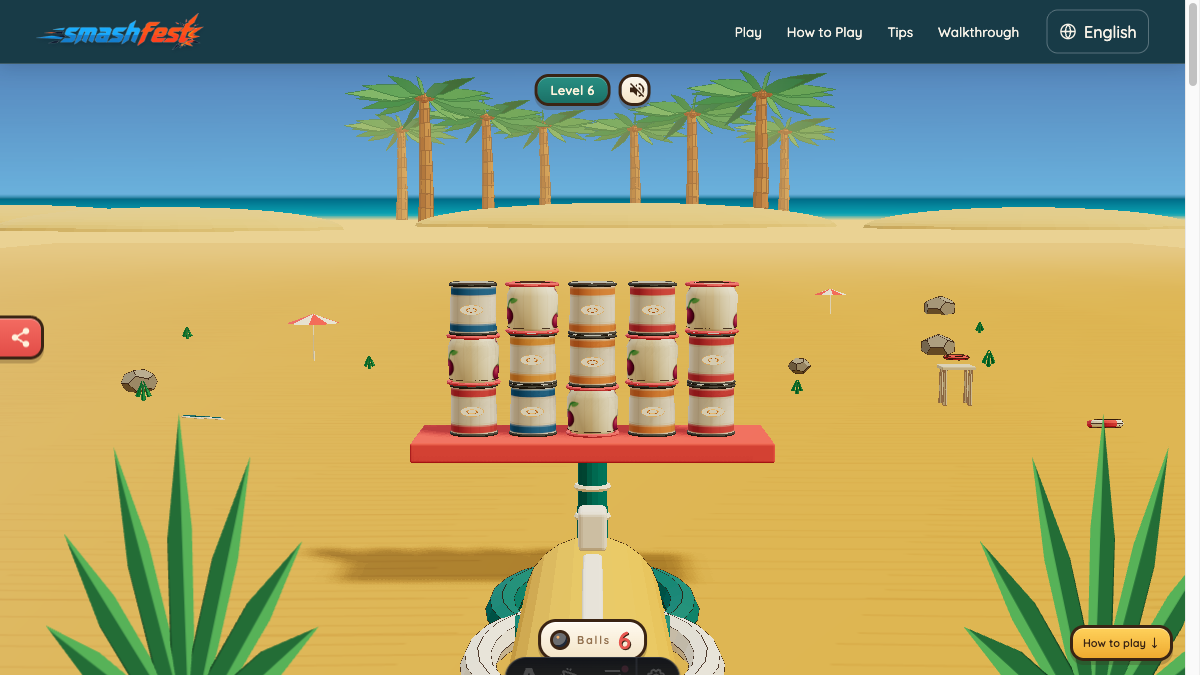 Smash Fest Level 6 Guide — Open the Fifteen-Target Mixed WallOriginal written guide · real game screenshotRead the English guide →
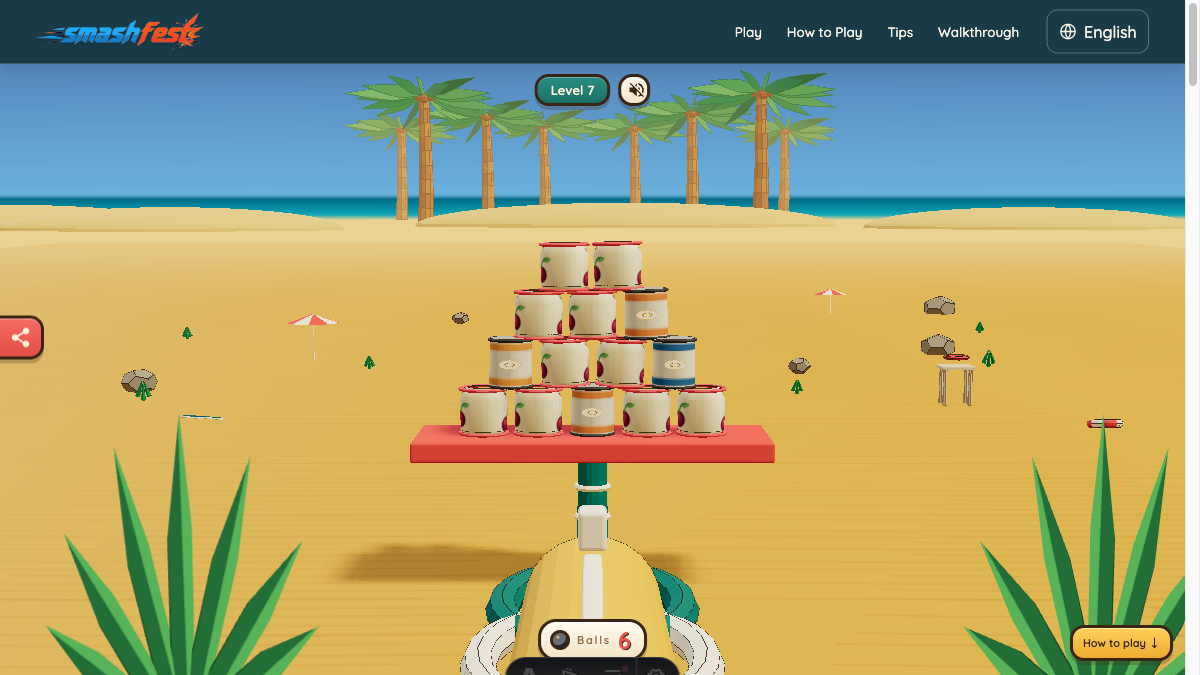 Smash Fest Level 7 Guide — Build a Four-Row Pyramid CascadeOriginal written guide · real game screenshotRead the English guide →
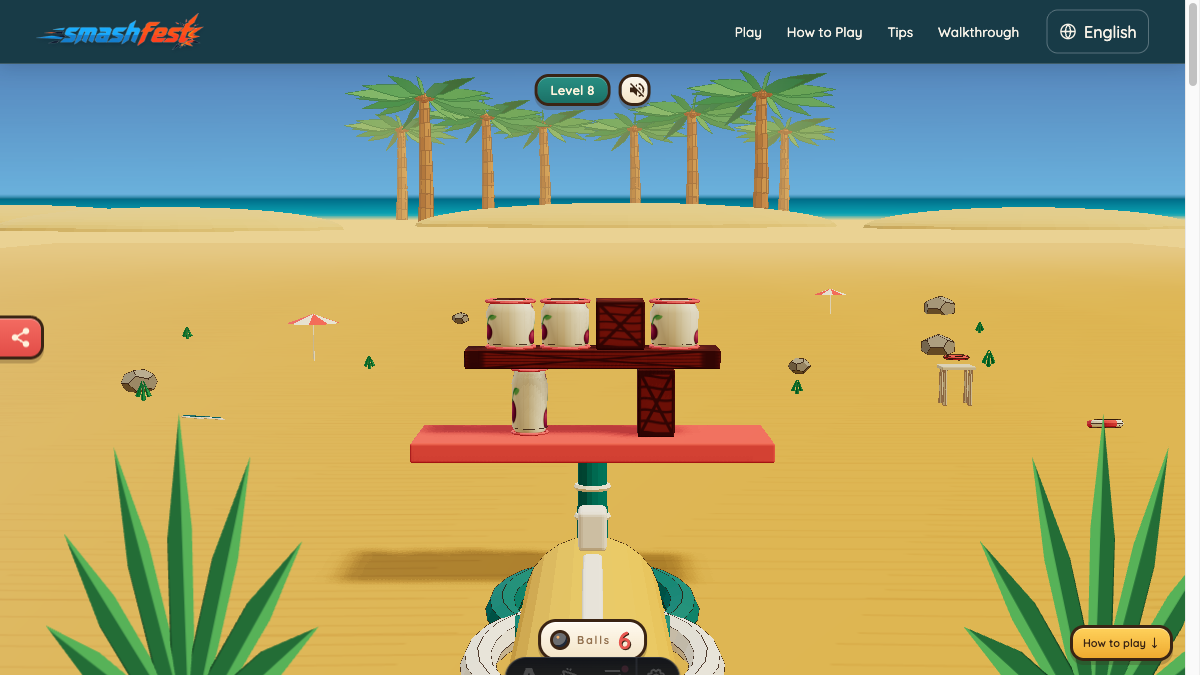 Smash Fest Level 8 Guide — Collapse the Glass-and-Wood BridgeOriginal written guide · real game screenshotRead the English guide →
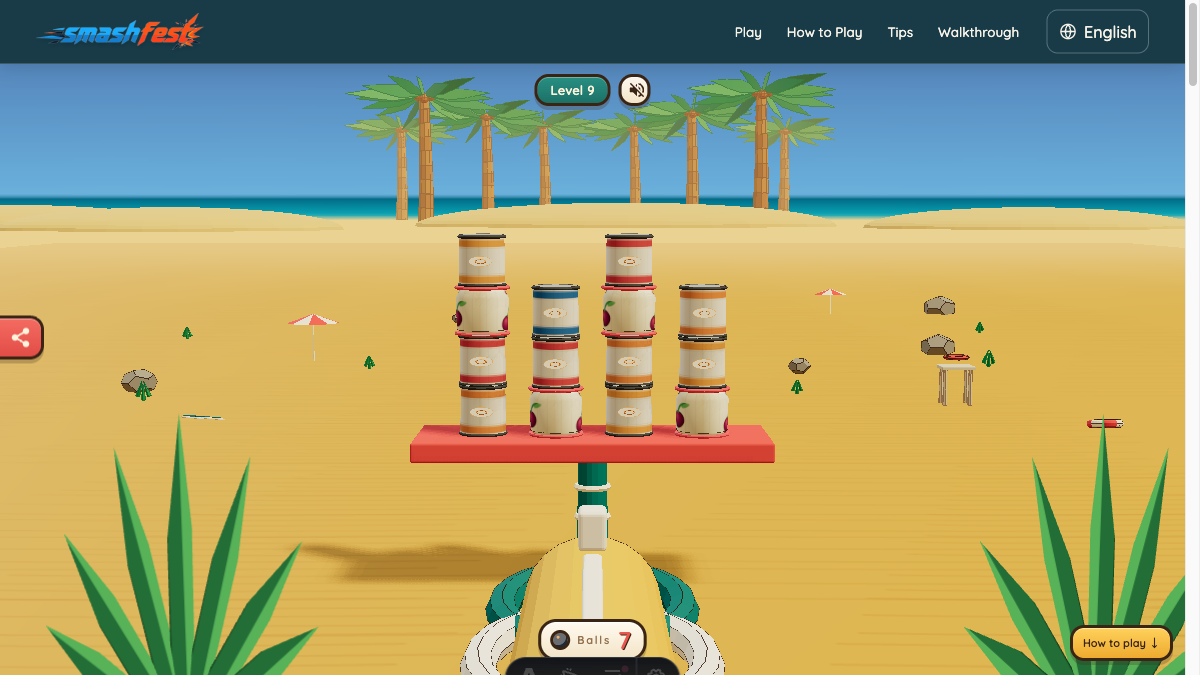 Smash Fest Level 9 Guide — Clear Both Mixed Tower SidesOriginal written guide · real game screenshotRead the English guide →
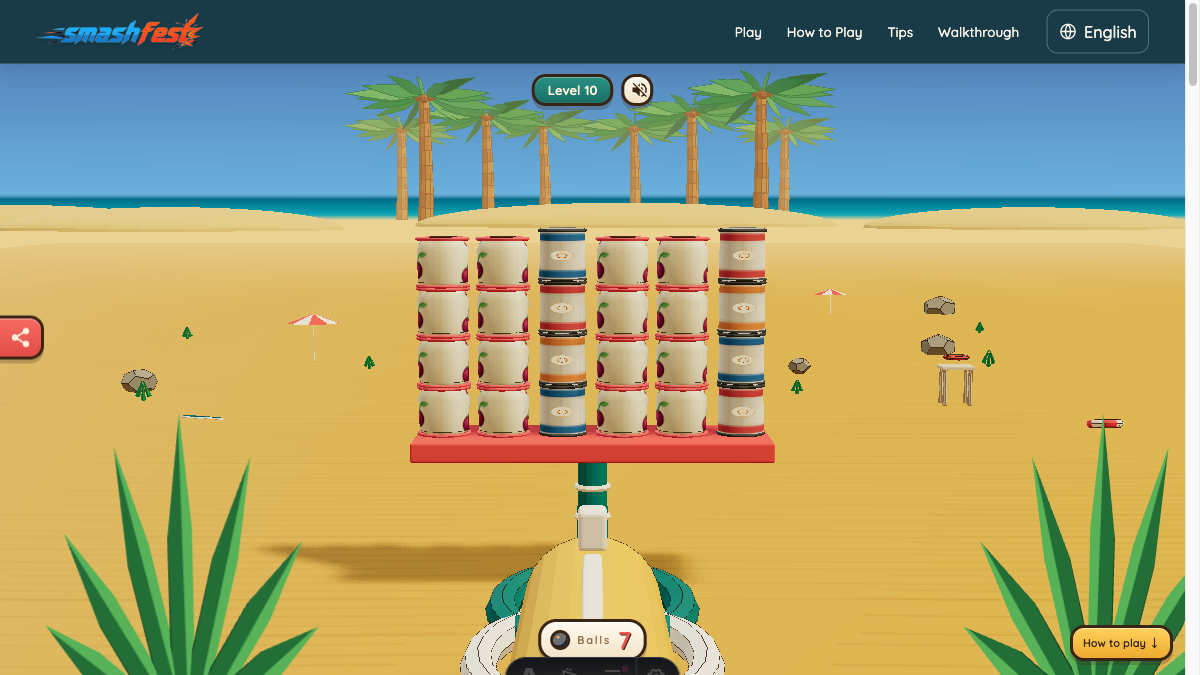 Smash Fest Level 10 Guide — Four-Shot Six-Column Wall FinishOriginal written guide · real game screenshotRead the English guide →
Play Smash Fest Level Guide — Chapters 1 to 10 Breakdown
Explore the complete 100-level layout specification. Each chapter introduces new structural challenges, material combinations, cannonball budgets, and target par scores.
Chapter 1: Glass Shore (Levels 1–10)
| Level | Pattern | Materials | Ammo / Par | Strategy Focus |
|---|---|---|---|---|
| Level 1 | Target Wall | Tin | 20 balls / Par 5 | Open the center lane first, then keep pressure on the shared gap. |
| Level 2 | Target Wall | Glass, Tin | 4 balls / Par 2 | Open the center lane first, then keep pressure on the shared gap. |
| Level 3 | Falling Pyramid | Glass | 4 balls / Par 2 | Work from the edge nearest the drop zone and collapse inward. |
| Level 4 | Split Towers | Tin, Glass | 5 balls / Par 3 | Start a controlled chain reaction and let moving pieces hit the next layer. |
| Level 5 | Support Arches | Glass, Wood | 5 balls / Par 2 | Remove the lowest shared support and wait for gravity before cleaning up. |
| Level 6 | Target Wall | Tin, Glass | 6 balls / Par 3 | Open the center lane first, then keep pressure on the shared gap. |
| Level 7 | Falling Pyramid | Glass, Tin | 6 balls / Par 3 | Start a controlled chain reaction and let moving pieces hit the next layer. |
| Level 8 | Loaded Bridge | Glass, Wood | 6 balls / Par 3 | Remove the lowest shared support and wait for gravity before cleaning up. |
| Level 9 | Split Towers | Tin, Glass | 7 balls / Par 4 | Work from the edge nearest the drop zone and collapse inward. |
| Level 10 | Target Wall | Glass, Tin | 7 balls / Par 4 | Open the center lane first, then keep pressure on the shared gap. |
Chapter 2: Timber Bay (Levels 11–20)
| Level | Pattern | Materials | Ammo / Par | Strategy Focus |
|---|---|---|---|---|
| Level 11 | Support Arches | Wood, Glass | 7 balls / Par 3 | Remove the lowest shared support and wait for gravity before cleaning up. |
| Level 12 | Loaded Bridge | Wood, Tin | 7 balls / Par 3 | Remove the lowest shared support and wait for gravity before cleaning up. |
| Level 13 | Split Towers | Wood, Glass | 8 balls / Par 4 | Start a controlled chain reaction and let moving pieces hit the next layer. |
| Level 14 | Falling Pyramid | Wood, Tin | 8 balls / Par 4 | Work from the edge nearest the drop zone and collapse inward. |
| Level 15 | Support Arches | Wood, Glass | 8 balls / Par 4 | Open the center lane first, then keep pressure on the shared gap. |
| Level 16 | Target Wall | Wood, Glass | 9 balls / Par 5 | Remove the lowest shared support and wait for gravity before cleaning up. |
| Level 17 | Loaded Bridge | Wood, Glass | 9 balls / Par 5 | Start a controlled chain reaction and let moving pieces hit the next layer. |
| Level 18 | Split Towers | Wood, Tin | 9 balls / Par 5 | Work from the edge nearest the drop zone and collapse inward. |
| Level 19 | Support Arches | Wood, Tin | 10 balls / Par 5 | Remove the lowest shared support and wait for gravity before cleaning up. |
| Level 20 | Loaded Bridge | Wood, Glass | 10 balls / Par 6 | Remove the lowest shared support and wait for gravity before cleaning up. |
Chapter 3: Stone Breakwater (Levels 21–30)
| Level | Pattern | Materials | Ammo / Par | Strategy Focus |
|---|---|---|---|---|
| Level 21 | Support Arches | Stone, Glass | 9 balls / Par 5 | Remove the lowest shared support and wait for gravity before cleaning up. |
| Level 22 | Target Wall | Stone, Glass | 10 balls / Par 5 | Open the center lane first, then keep pressure on the shared gap. |
| Level 23 | Falling Pyramid | Stone, Tin | 10 balls / Par 6 | Work from the edge nearest the drop zone and collapse inward. |
| Level 24 | Loaded Bridge | Stone, Wood | 10 balls / Par 5 | Remove the lowest shared support and wait for gravity before cleaning up. |
| Level 25 | Split Towers | Stone, Glass | 11 balls / Par 6 | Start a controlled chain reaction and let moving pieces hit the next layer. |
| Level 26 | Support Arches | Stone, Tin | 11 balls / Par 6 | Open the center lane first, then keep pressure on the shared gap. |
| Level 27 | Target Wall | Stone, Wood | 12 balls / Par 7 | Remove the lowest shared support and wait for gravity before cleaning up. |
| Level 28 | Falling Pyramid | Stone, Glass | 12 balls / Par 7 | Start a controlled chain reaction and let moving pieces hit the next layer. |
| Level 29 | Loaded Bridge | Stone, Tin | 12 balls / Par 7 | Work from the edge nearest the drop zone and collapse inward. |
| Level 30 | Split Towers | Stone, Wood | 13 balls / Par 8 | Remove the lowest shared support and wait for gravity before cleaning up. |
Chapter 4: Chain Reaction (Levels 31–40)
| Level | Pattern | Materials | Ammo / Par | Strategy Focus |
|---|---|---|---|---|
| Level 31 | Target Wall | Glass, Stone | 12 balls / Par 7 | Open the center lane first, then keep pressure on the shared gap. |
| Level 32 | Support Arches | Tin, Wood | 12 balls / Par 7 | Remove the lowest shared support and wait for gravity before cleaning up. |
| Level 33 | Loaded Bridge | Glass, Stone | 12 balls / Par 7 | Start a controlled chain reaction and let moving pieces hit the next layer. |
| Level 34 | Falling Pyramid | Tin, Wood | 13 balls / Par 8 | Work from the edge nearest the drop zone and collapse inward. |
| Level 35 | Split Towers | Glass, Stone | 13 balls / Par 8 | Start a controlled chain reaction and let moving pieces hit the next layer. |
| Level 36 | Support Arches | Wood, Tin | 13 balls / Par 8 | Open the center lane first, then keep pressure on the shared gap. |
| Level 37 | Target Wall | Stone, Glass | 14 balls / Par 9 | Remove the lowest shared support and wait for gravity before cleaning up. |
| Level 38 | Loaded Bridge | Wood, Stone | 14 balls / Par 9 | Remove the lowest shared support and wait for gravity before cleaning up. |
| Level 39 | Falling Pyramid | Glass, Tin | 14 balls / Par 9 | Start a controlled chain reaction and let moving pieces hit the next layer. |
| Level 40 | Split Towers | Stone, Wood | 15 balls / Par 10 | Work from the edge nearest the drop zone and collapse inward. |
Chapter 5: Festival Grounds (Levels 41–50)
| Level | Pattern | Materials | Ammo / Par | Strategy Focus |
|---|---|---|---|---|
| Level 41 | Loaded Bridge | Stone, Glass | 14 balls / Par 9 | Remove the lowest shared support and wait for gravity before cleaning up. |
| Level 42 | Support Arches | Wood, Stone | 14 balls / Par 9 | Open the center lane first, then keep pressure on the shared gap. |
| Level 43 | Target Wall | Glass, Stone | 15 balls / Par 10 | Start a controlled chain reaction and let moving pieces hit the next layer. |
| Level 44 | Falling Pyramid | Tin, Wood | 15 balls / Par 10 | Work from the edge nearest the drop zone and collapse inward. |
| Level 45 | Split Towers | Stone, Glass | 15 balls / Par 10 | Remove the lowest shared support and wait for gravity before cleaning up. |
| Level 46 | Support Arches | Wood, Tin | 16 balls / Par 11 | Start a controlled chain reaction and let moving pieces hit the next layer. |
| Level 47 | Loaded Bridge | Stone, Wood | 16 balls / Par 11 | Open the center lane first, then keep pressure on the shared gap. |
| Level 48 | Target Wall | Glass, Stone | 17 balls / Par 12 | Remove the lowest shared support and wait for gravity before cleaning up. |
| Level 49 | Falling Pyramid | Stone, Tin | 17 balls / Par 12 | Start a controlled chain reaction and let moving pieces hit the next layer. |
| Level 50 | Split Towers | Stone, Glass | 18 balls / Par 13 | Dislodge the top weight so it falls through the structure below. |
Chapter 6: Reinforced Pier (Levels 51–60)
| Level | Pattern | Materials | Ammo / Par | Strategy Focus |
|---|---|---|---|---|
| Level 51 | Target Wall | Tin, Stone | 19 balls / Par 14 | Remove the lowest shared support and wait for gravity before cleaning up. |
| Level 52 | Falling Pyramid | Wood, Stone | 19 balls / Par 14 | Start a controlled chain reaction and let moving pieces hit the next layer. |
| Level 53 | Split Towers | Stone, Glass | 19 balls / Par 15 | Work from the edge nearest the drop zone and collapse inward. |
| Level 54 | Support Arches | Wood, Stone | 20 balls / Par 15 | Remove the lowest shared support and wait for gravity before cleaning up. |
| Level 55 | Loaded Bridge | Stone, Tin | 19 balls / Par 14 | Open the center lane first, then keep pressure on the shared gap. |
| Level 56 | Target Wall | Wood, Stone | 20 balls / Par 16 | Start a controlled chain reaction and let moving pieces hit the next layer. |
| Level 57 | Falling Pyramid | Stone, Glass | 21 balls / Par 16 | Work from the edge nearest the drop zone and collapse inward. |
| Level 58 | Split Towers | Stone, Wood | 21 balls / Par 16 | Dislodge the top weight so it falls through the structure below. |
| Level 59 | Support Arches | Tin, Stone | 20 balls / Par 16 | Remove the lowest shared support and wait for gravity before cleaning up. |
| Level 60 | Loaded Bridge | Stone, Wood | 20 balls / Par 17 | Start a controlled chain reaction and let moving pieces hit the next layer. |
Chapter 7: Counterweight Cove (Levels 61–70)
| Level | Pattern | Materials | Ammo / Par | Strategy Focus |
|---|---|---|---|---|
| Level 61 | Target Wall | Stone, Wood | 20 balls / Par 16 | Remove the lowest shared support and wait for gravity before cleaning up. |
| Level 62 | Falling Pyramid | Stone, Tin | 20 balls / Par 17 | Start a controlled chain reaction and let moving pieces hit the next layer. |
| Level 63 | Split Towers | Stone, Glass | 21 balls / Par 17 | Dislodge the top weight so it falls through the structure below. |
| Level 64 | Support Arches | Stone, Wood | 21 balls / Par 17 | Work from the edge nearest the drop zone and collapse inward. |
| Level 65 | Loaded Bridge | Stone, Tin | 20 balls / Par 16 | Remove the lowest shared support and wait for gravity before cleaning up. |
| Level 66 | Target Wall | Stone, Glass | 22 balls / Par 18 | Start a controlled chain reaction and let moving pieces hit the next layer. |
| Level 67 | Falling Pyramid | Stone, Wood | 22 balls / Par 18 | Dislodge the top weight so it falls through the structure below. |
| Level 68 | Split Towers | Stone, Tin | 23 balls / Par 19 | Remove the lowest shared support and wait for gravity before cleaning up. |
| Level 69 | Support Arches | Stone, Glass | 22 balls / Par 18 | Start a controlled chain reaction and let moving pieces hit the next layer. |
| Level 70 | Target Wall | Stone, Wood | 23 balls / Par 19 | Work from the edge nearest the drop zone and collapse inward. |
Chapter 8: Siege Shore (Levels 71–80)
| Level | Pattern | Materials | Ammo / Par | Strategy Focus |
|---|---|---|---|---|
| Level 71 | Target Wall | Stone, Glass | 21 balls / Par 18 | Dislodge the top weight so it falls through the structure below. |
| Level 72 | Falling Pyramid | Stone, Wood | 21 balls / Par 18 | Remove the lowest shared support and wait for gravity before cleaning up. |
| Level 73 | Split Towers | Stone, Tin | 22 balls / Par 19 | Start a controlled chain reaction and let moving pieces hit the next layer. |
| Level 74 | Support Arches | Stone, Glass | 21 balls / Par 18 | Work from the edge nearest the drop zone and collapse inward. |
| Level 75 | Target Wall | Stone, Wood | 23 balls / Par 20 | Remove the lowest shared support and wait for gravity before cleaning up. |
| Level 76 | Falling Pyramid | Stone, Tin | 22 balls / Par 19 | Start a controlled chain reaction and let moving pieces hit the next layer. |
| Level 77 | Split Towers | Stone, Glass | 23 balls / Par 20 | Dislodge the top weight so it falls through the structure below. |
| Level 78 | Target Wall | Stone, Wood | 24 balls / Par 21 | Work from the edge nearest the drop zone and collapse inward. |
| Level 79 | Falling Pyramid | Stone, Tin | 23 balls / Par 20 | Remove the lowest shared support and wait for gravity before cleaning up. |
| Level 80 | Split Towers | Stone, Glass | 24 balls / Par 21 | Start a controlled chain reaction and let moving pieces hit the next layer. |
Chapter 9: Breaker Gauntlet (Levels 81–90)
| Level | Pattern | Materials | Ammo / Par | Strategy Focus |
|---|---|---|---|---|
| Level 81 | Target Wall | Stone, Wood | 22 balls / Par 20 | Remove the lowest shared support and wait for gravity before cleaning up. |
| Level 82 | Falling Pyramid | Stone, Tin | 22 balls / Par 20 | Start a controlled chain reaction and let moving pieces hit the next layer. |
| Level 83 | Split Towers | Stone, Glass | 23 balls / Par 21 | Dislodge the top weight so it falls through the structure below. |
| Level 84 | Target Wall | Stone, Wood | 23 balls / Par 21 | Work from the edge nearest the drop zone and collapse inward. |
| Level 85 | Falling Pyramid | Stone, Tin | 23 balls / Par 21 | Remove the lowest shared support and wait for gravity before cleaning up. |
| Level 86 | Split Towers | Stone, Glass | 24 balls / Par 22 | Start a controlled chain reaction and let moving pieces hit the next layer. |
| Level 87 | Target Wall | Stone, Wood | 24 balls / Par 22 | Dislodge the top weight so it falls through the structure below. |
| Level 88 | Falling Pyramid | Stone, Tin | 24 balls / Par 22 | Work from the edge nearest the drop zone and collapse inward. |
| Level 89 | Split Towers | Stone, Glass | 25 balls / Par 23 | Remove the lowest shared support and wait for gravity before cleaning up. |
| Level 90 | Target Wall | Stone, Wood | 25 balls / Par 23 | Start a controlled chain reaction and let moving pieces hit the next layer. |
Chapter 10: Grand Finale (Levels 91–100)
| Level | Pattern | Materials | Ammo / Par | Strategy Focus |
|---|---|---|---|---|
| Level 91 | Target Wall | Stone, Glass | 23 balls / Par 22 | Remove the lowest shared support and wait for gravity before cleaning up. |
| Level 92 | Split Towers | Stone, Wood | 23 balls / Par 22 | Start a controlled chain reaction and let moving pieces hit the next layer. |
| Level 93 | Target Wall | Stone, Tin | 24 balls / Par 23 | Dislodge the top weight so it falls through the structure below. |
| Level 94 | Falling Pyramid | Stone, Glass | 24 balls / Par 23 | Work from the edge nearest the drop zone and collapse inward. |
| Level 95 | Split Towers | Stone, Wood | 24 balls / Par 23 | Remove the lowest shared support and wait for gravity before cleaning up. |
| Level 96 | Target Wall | Stone, Tin | 25 balls / Par 24 | Start a controlled chain reaction and let moving pieces hit the next layer. |
| Level 97 | Split Towers | Stone, Glass | 25 balls / Par 24 | Dislodge the top weight so it falls through the structure below. |
| Level 98 | Target Wall | Stone, Wood | 25 balls / Par 24 | Work from the edge nearest the drop zone and collapse inward. |
| Level 99 | Split Towers | Stone, Tin | 26 balls / Par 25 | Remove the lowest shared support and wait for gravity before cleaning up. |
| Level 100 | Target Wall | Stone, Glass | 26 balls / Par 25 | Dislodge the top weight so it falls through the structure below. |
How to use these walkthroughs
Play the level once before opening its guide. Notice which objects count as targets, which pieces are only supports, and where a falling object has room to travel. Then compare your observation with the structure analysis and opening plan. The step-by-step sequence gives a reliable route, but small aim changes can create different rebounds, so the final target count matters more than copying a pixel-perfect cursor position.
After each shot, pause until moving pieces have stopped. A support that appears stable may still be rotating, a glass panel may be sliding toward an edge, or a falling can may be about to strike another target. Spending the next cannonball too early can block a useful chain reaction and makes it harder to understand which shot actually solved the structure.
Read the structure before firing
Start at the bottom of the construction. Shared supports, narrow feet, bridge joints, and the lowest piece in a center stack usually control more mass than exposed decorations near the top. A low impact can remove support while preserving the cannonball's horizontal momentum, allowing one shot to affect several targets. A high impact often breaks only the object it touches and leaves the load-bearing frame intact.
Next, identify the nearest open edge. Tin, wood, and stone do not always need to break; many targets clear when they are pushed off the platform. Glass is different because it responds well to direct impact and can start a cascade. The best route therefore depends on both material and geometry rather than on material alone.
10-Chapter Progression & Strategic Doctrines
Chapter 1 (Glass Shore, Levels 1–10): Focuses on center-lane penetrations and learning displacement physics with tin and glass. Opening shots should aim low and center to fracture multiple baseline targets.
Chapter 2 (Timber Bay, Levels 11–20): Introduces load-bearing wood beams and cantilever bridges. The core doctrine is to identify shared vertical studs and use gravity to let upper targets shear downward.
Chapter 3 (Stone Breakwater, Levels 21–30): Features heavy stone blocks. Direct impact is inefficient; instead, dislodge the supporting timber underneath so stone mass turns into a secondary battering ram.
Chapter 4 (Chain Reaction, Levels 31–40): Combines fragile glass fuses with tumbling cylinders. Precision aiming triggers domino effects that collapse multi-tier structures on a tight ammunition budget.
Chapter 5 (Festival Grounds, Levels 41–50): Wide compound layouts with multiple independent towers. The optimal tactic is outward displacement toward the left and right table edges.
Chapter 6 (Reinforced Pier, Levels 51–60): Introduces reinforced interlocking foundations where ammo margins drop to 5. Every shot must fulfill dual roles: weakening a foundation and clearing debris.
Chapter 7 (Counterweight Cove, Levels 61–70): Asymmetrical balance puzzles. Shifting a high stone counterweight causes entire archways to pivot off the platform under their own gravitational torque.
Chapter 8 (Siege Shore, Levels 71–80): Fortified multi-material pyramids. Requires systematic outside-in deconstruction, peeling outer layers before targeting core supports.
Chapter 9 (Breaker Gauntlet, Levels 81–90): Extremely tight ammunition limits (margin of 2). Requires zero wasted balls, perfect aim on key structural keystones, and disciplined settling pauses.
Chapter 10 (Grand Finale, Levels 91–100): The ultimate master challenge. Level 100 features massive multi-layered stone fortresses where only single-point structural buckling can achieve par rating.
Material Physics & Collision Dynamics
Glass (Low Mass, High Fragility): Shatters instantly upon high-velocity impact or moderate kinetic compression. Ideal for opening corridors through dense formations.
Tin (Low Mass, Low Friction): Readily slides and rolls across flat surfaces. Aim shallow and low to impart horizontal velocity towards the nearest table boundary.
Wood (Medium Mass, High Friction): Provides rigid structural support. Resists lateral sliding, making direct base strikes necessary to topple upright beams.
Stone (High Mass, High Inertia): Extremely resistant to single-ball displacement. When dropped from height, its immense momentum effortlessly crushes wood and glass structures beneath.
Recovering from an imperfect collapse
Do not automatically restart when the first shot differs from the guide. Count the remaining targets and inspect their new positions. A fallen target near an edge may be easier than it was in the original structure, while an isolated target trapped behind debris may justify a reset. The alternative-route section on each guide explains how to make that decision without wasting the entire ammunition budget.
Use direct cleanup shots only after the main structure has settled. Aim through the center of an isolated target when you need a predictable result; aim low and toward the nearest edge when displacement is enough. If debris blocks the lane, a small hit on the obstruction can be more efficient than trying to force a shot through it.
Accuracy, par, and repeatable practice
Par is a practice target, not a requirement for unlocking the next level. First learn a safe clear, then replay and reduce shots by combining setup and cleanup. A repeatable opening is one you can explain: which support you chose, where the impact should travel, and what result tells you to continue or reset.
For useful practice, change one variable at a time. Move the aim slightly higher or lower while keeping the same target, then compare the collapse. Random shots create dramatic motion but teach very little. Controlled experiments reveal how the browser physics responds to leverage, impact direction, material strength, and platform edges.
Walkthrough & Strategy Questions
Why are Levels 1–10 given full step-by-step guides while Chapters 1–10 have structural overviews?
Levels 1–10 teach the fundamental physics rules, material interactions, and aim mechanics required for the entire game. The chapter breakdowns provide strategic doctrines, ammo margins, and structural weak points for all 100 levels.
Do I have to follow every shot exactly to clear a level?
No. Rigid-body physics simulations have slight variations depending on exact contact angles. Use our guides to identify the core load-bearing support, then adapt cleanup shots based on where targets settle.
How do I earn 3 stars on every level?
Three-star ratings require clearing all targets within or under the designated Par shot limit while maximizing remaining ammunition bonuses. Master the opening shot to trigger maximum chain reactions.
Are these walkthroughs verified on real browser engines?
Yes. All level parameters, ammo budgets, and screenshots are tested directly inside the Three.js and Rapier physics runtime on Chrome, Safari, and Firefox across desktop and mobile devices.