
Chapter 1 · Glass pyramid control
Smash Fest Level 3 Guide — Glass Pyramid Side Attack
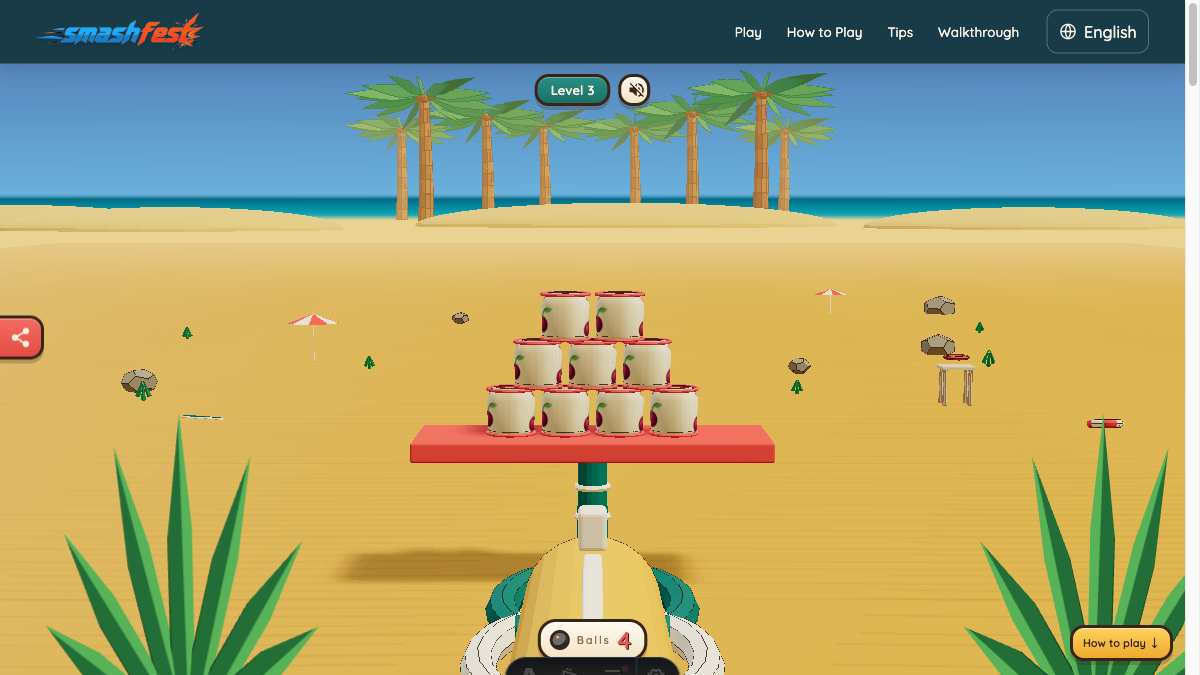
Level 3 contains nine glass objectives arranged as a three-row pyramid. You have four cannonballs and a two-shot par. Unlike the mixed wall in Level 2, every target is brittle glass, so direct impact and secondary collision can remove objectives instead of merely moving them. The pyramid shape makes support narrow toward the top and broad across the bottom.
The recorded strategy for this level is sides. The reason is structural: a side contact can remove an outer base and give the upper glass room to rotate across the remaining stack. A straight hit into the top may break one target but leave the wide lower row untouched. The goal is to start a diagonal collapse, wait for the glass chain to finish, then address the stable side that remains.
Cannonballs
4Materials
GlassPar
2Targets
9Map the nine-target pyramid
The level spans four nominal columns but contains nine pieces because each higher row is narrower than the one below it. The lowest targets define the footprint; the middle row transfers weight inward; the top target has little leverage over the base. Since every piece is glass, contacts created by falling pieces matter as much as the cannonball's first impact.
Look for an outer bottom target that has open space beyond it. Removing or driving through that target creates a direction for the rest of the formation. The opposite outer base becomes the likely second-shot area. This left-right plan keeps the two-shot budget tied to the pyramid's shape instead of using both balls on the same central column.
Opening plan: begin at one lower shoulder
Place the first aim on a low glass target near one side of the base, not at the extreme top and not through the empty space beside the pyramid. A clean hit should remove glass and let the upper row lean into the opening. Keep the shot close enough to the base that the pieces above it lose support.
Watch the collapse across the center before choosing the second side. Glass can break from the initial ball, from falling, or from contact with another target. If the middle continues moving, wait. The second shot belongs on the stable lower shoulder that did not participate in the first chain.
Step-by-step Level 3 plan
Select an open lower side
Choose the bottom-left or bottom-right glass target according to which side gives falling pieces more empty space. Center the reticle on the glass rather than grazing its outer edge.
Let the diagonal collapse cross the middle
After impact, follow the upper pieces as they rotate into the gap. Do not fire while glass is still falling or while the remaining-target counter is changing.
Clear the opposite stable shoulder
If targets remain, aim at the lowest glass on the side that stayed upright. This creates a second inward collapse and uses the two shots on separate support zones.
Recover with a direct glass contact
Use a reserve ball only for a clearly isolated objective. Because every target is glass, a centered direct hit is safer than trying to push it along the surface.
Why the side attack beats a top-first shot
A pyramid distributes its weight through a broad base. The upper glass is visually prominent but supports little beneath it. Removing a lower side changes the contact path for several pieces at once, while gravity supplies rotation and downward force. The falling glass then creates additional impacts without spending another cannonball.
Alternating sides also avoids a common central remnant. Two shots through the same area may leave both outer shoulders intact. One low shot on each side makes the remaining footprint narrower from both directions, increasing the chance that the last middle pieces collide or lose stable support.
Alternative for a narrow center remnant
If the first side collapse removes both shoulders but leaves a short central stack, change the second shot from a side aim to the lowest remaining central glass. A direct hit there removes the support actually present. Do not follow the original plan mechanically when the physical result has already changed the shape.
Common Level 3 mistakes
Breaking the top first
The top target is easy to see but does not open the broad base that holds the pyramid together.
Aiming outside the glass
A very wide side shot can miss the target or create a weak graze. Use the side strategy with a centered contact.
Interrupting falling glass
Secondary impacts are valuable. A premature second ball can pass through a gap that moving pieces were about to fill.
Level 3 replay checklist
- The first target was on a lower shoulder of the pyramid.
- Falling glass completed its chain before the second aim.
- The second shot matched the stable shape actually left behind.
- Direct recovery was reserved for isolated glass.
- The two planned shots attacked different support zones.
Continue learning
Replay Level 3 from the browser game, then compare the result with the material and support principles in the related guides. Physics can settle differently after small aim changes, so use the visible target count as the final check.