
Chapter 1 · Dense mixed wall
Smash Fest Level 6 Guide — Open the Fifteen-Target Mixed Wall
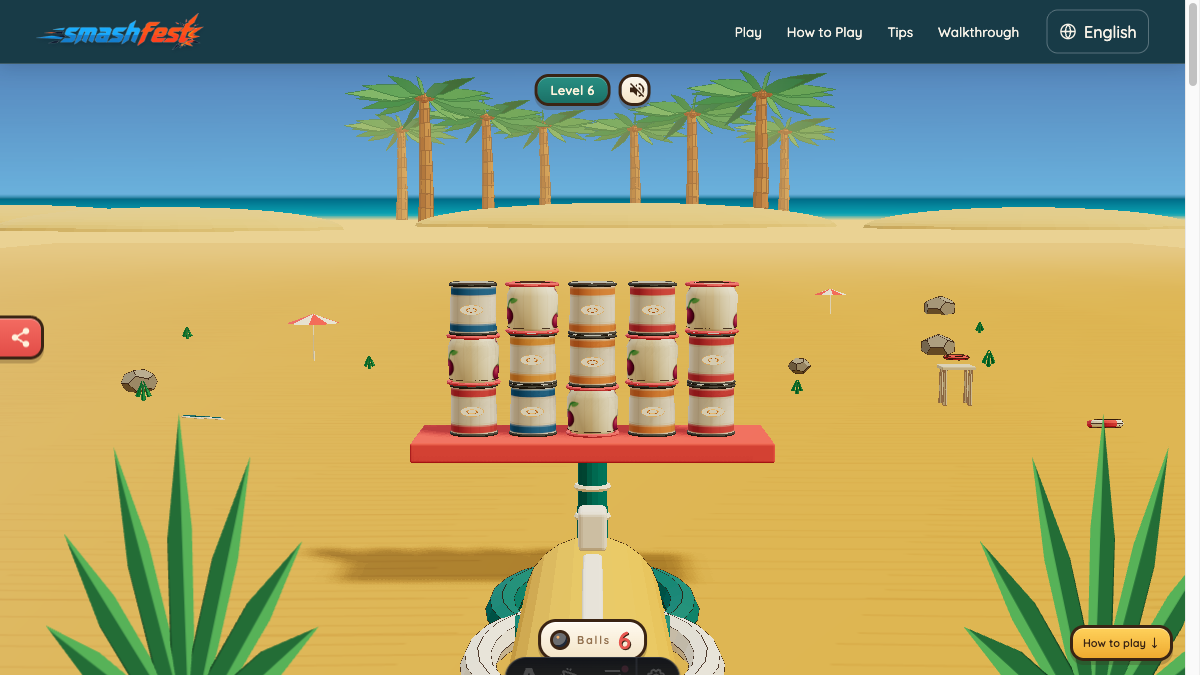
Level 6 returns to a wall, but it is denser and less forgiving than Level 2. Fifteen tin and glass objectives fill five columns and three rows. You receive six cannonballs and a par target of three. The level's center strategy reflects the compact footprint: a low opening near the midpoint can disturb several contacts, while a high or extreme-edge hit is likely to affect only a small slice.
The challenge is to combine two success conditions inside one collapse. Glass can break from direct or secondary contact. Tin must gain enough displacement to leave the platform. A useful opening breaks or moves the center, gives upper targets room to fall, and sends the remaining tin toward open sides. The second and third shots should respond to the stable groups left after each settle.
Cannonballs
6Materials
Tin · GlassPar
3Targets
15Read five columns and three material layers
The wall covers nearly five world units horizontally and a little over three vertically. Its middle column is connected to targets on both sides, and the lower row carries two rows above it. That makes the lower center a high-value contact area. The material mix means a single visual gap does not tell the whole story: broken glass may be gone while tin beside it remains active on the table.
Divide the wall into a central opening zone and two side remnants. The opening shot addresses the first zone. After it settles, compare the left and right clusters by live target count and stability. Use shot two on the denser stable side and keep shot three for the other side or an isolated objective.
Opening plan: create a low central gap
Aim at a bottom-row target near the shared center. Choose a line that continues slightly toward the side with a clearer edge rather than driving every target straight backward. A centered contact can break glass, push tin, and remove support from the two rows above.
After firing, watch the full three-row collapse. The upper targets may drop into the central gap and create late impacts. Do not decide on shot two while the target counter is still falling. Once stable, target the lower inner edge of the stronger remaining side.
Step-by-step Level 6 plan
Open the bottom center
Place the first ball into a lower central objective. Keep the shot level enough to transfer sideways motion through neighboring pieces and open support above.
Compare the two remnants
Wait until glass fragments and tin movement stop changing the objective count. Identify which side still has multiple rows or a stable base.
Drive through the stronger inner base
Aim low on the center-facing edge of that side. This sends movement outward and avoids compressing the cluster back into the middle.
Use shot three on the final stable condition
Break a remaining glass target directly or push grounded tin toward its nearest edge. Preserve the other three balls until the planned shot has settled.
Why a staged center clear fits this wall
Three rows create enough height for gravity to contribute but not enough for a top-only hit to dismantle the base. The low center connects both halves and supports the rows above. Once that area moves, falling glass can break and tin can acquire extra impulse from several contacts.
The staged left-right cleanup keeps the three-shot par tied to structural zones. Firing three balls rapidly into the middle treats the changing wall as if it were static. Waiting turns each shot into a new decision made with fewer targets and clearer edge routes.
Alternative when a central tin pile forms
If the opening drops targets inward and leaves a compact tin pile, do not continue shooting straight through its center. Choose the lower side of the pile that points toward the closest edge and apply one directed push. Let the pile spread, then use a direct shot on any glass still protected behind it.
Common Level 6 mistakes
Aiming above the supporting row
The upper glass may break, but the five-column base remains organized and consumes later cleanup shots.
Pushing both sides inward
Inward follow-ups create a dense central pile. Work from each inner edge toward open space instead.
Using all six balls as a plan
The extra allowance is recovery capacity. Three deliberate structural shots teach more and usually leave less clutter.
Level 6 replay checklist
- The opening created a gap in the lower center.
- The three-row fall completed before the next decision.
- The stronger side was pushed outward from its inner base.
- Cleanup matched glass or tin behavior.
- The three-shot par organized the run despite six available balls.
Continue learning
Replay Level 6 from the browser game, then compare the result with the material and support principles in the related guides. Physics can settle differently after small aim changes, so use the visible target count as the final check.