
Chapter 1 · Four-row tower sides
Smash Fest Level 9 Guide — Clear Both Mixed Tower Sides
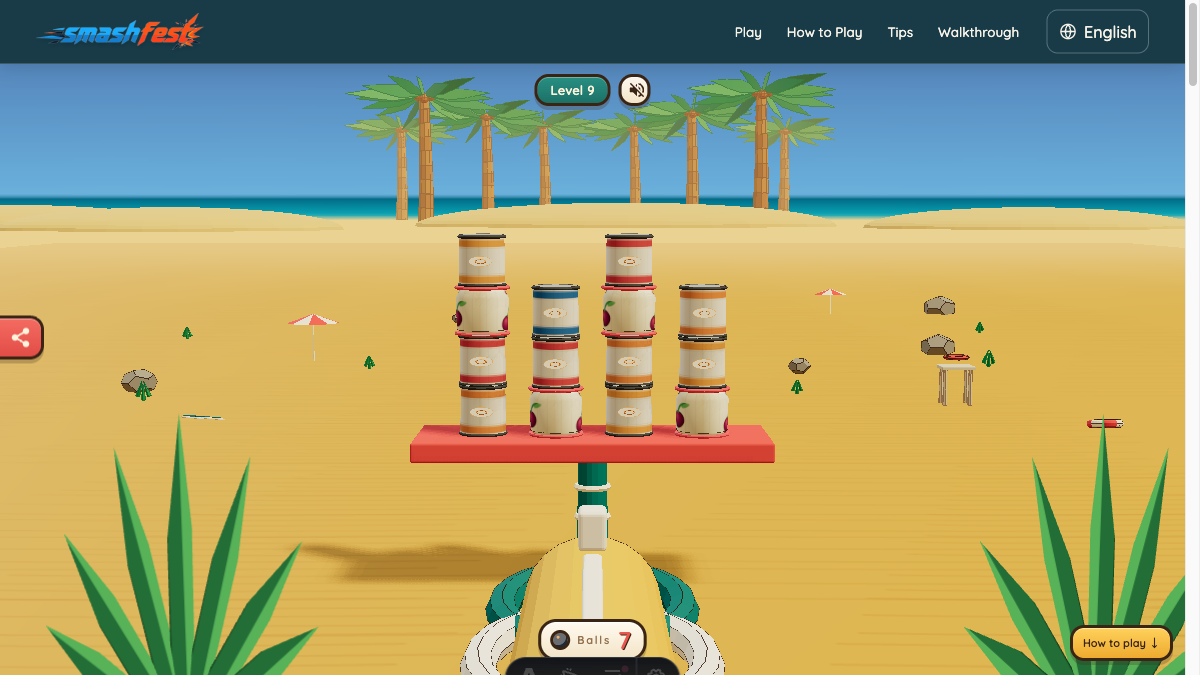
Level 9 builds 14 tin and glass objectives into a four-row tower pattern. The layout spans two broad sides, rises a little over four world units, gives you seven cannonballs, and sets a par of four. Its strategy is sides. Unlike Level 4's inward cascade emphasis, this level benefits from treating the two tall zones as separate support problems while still watching for cross-center movement.
Four rows add time and uncertainty to each fall. Glass can break during the collapse, but tin may land flat and remain active. A sensible four-shot plan opens one lower side, waits, opens the other stable side, and reserves two shots for the material-specific remnants created by those falls. The three extra balls are recovery, not permission to fire continuously.
Cannonballs
7Materials
Tin · GlassPar
4Targets
14Divide the towers into left and right support zones
The objectives extend roughly the same distance to both sides of center. Within each zone, the lower pieces carry multiple rows. The outer silhouette can make high targets look accessible, but low contacts determine whether an entire side rotates. Mixed material means the outcome of each side collapse must be read after it happens.
Assign the first two planned shots to structural zones rather than individual objects. Choose one tower's low support, then the other side only if it remains stable. Assign the third and fourth shots after the structure has simplified. This prevents early cleanup from distracting you while a full tower is still capable of falling.
Opening plan: clear one side at a time
Start at the lower inner or outer support of one tower according to the open edge route. The shot should remove support and encourage the tower to fall into clear space, not simply break a high glass piece. Watch all four rows and any tin that rolls after the first drop.
Once stable, inspect the opposite tower. If it remains vertical, mirror the support logic there. If it already moved because of cross-center contact, target its actual lowest stable point. This side-by-side sequencing gives each tall zone room to resolve before the next cannonball enters.
Step-by-step Level 9 plan
Choose the clearer first side
Compare edge space and lower support visibility. Aim at the base of the tower that can fall without being trapped against the other group.
Resolve all four rows
After shot one, wait for upper glass, moving tin, and secondary contacts. Do not switch sides while the objective count is still changing.
Open the remaining stable tower
Use shot two on its lowest meaningful support. Match the actual leaning direction rather than forcing a perfect mirror of the first aim.
Spend shots three and four on verified remnants
Break stable glass directly and push grounded tin toward open edges. Let shot three settle before committing shot four to the final objective.
Why side sequencing controls a tall level
Each tower stores height above a narrow base. A low support hit turns several upper targets into moving participants, making one structural shot worth more than a series of high direct hits. Handling one side at a time also preserves open space for the collapse instead of filling the center with simultaneous, unpredictable movement.
The four-shot par matches the level's likely phases: two structural openings and up to two cleanup decisions. It does not require exactly one shot per phase in every physics outcome, but it is a useful discipline. The plan postpones cleanup until the large structures have done all the work gravity can provide.
Alternative when the first tower crosses the center
If the first tower falls inward and destabilizes the other side, do not fire the planned mirror shot automatically. Wait for both groups to settle, then locate the lowest stable remnant anywhere in the combined shape. A direct glass clear or an edge-directed tin push may now be more useful than attacking an already broken support zone.
Common Level 9 mistakes
Alternating sides too quickly
A four-row tower takes time to finish. The other side may join the collapse without a dedicated shot.
Clearing high glass while the base stands
Direct breaks reduce the count but leave the tower's best multi-target opportunity unused.
Assuming horizontal tin is gone
Fallen tin remains live on the table. Plan an outward push after the tower has fully settled.
Level 9 replay checklist
- The first tower had a clear fall route.
- All four rows settled before changing sides.
- The second structural shot was conditional, not automatic.
- Shots three and four addressed verified material remnants.
- The seven-ball allowance did not replace the four-shot plan.
Continue learning
Replay Level 9 from the browser game, then compare the result with the material and support principles in the related guides. Physics can settle differently after small aim changes, so use the visible target count as the final check.