
Chapter 1 finale · Wide mixed wall
Smash Fest Level 10 Guide — Four-Shot Six-Column Wall Finish
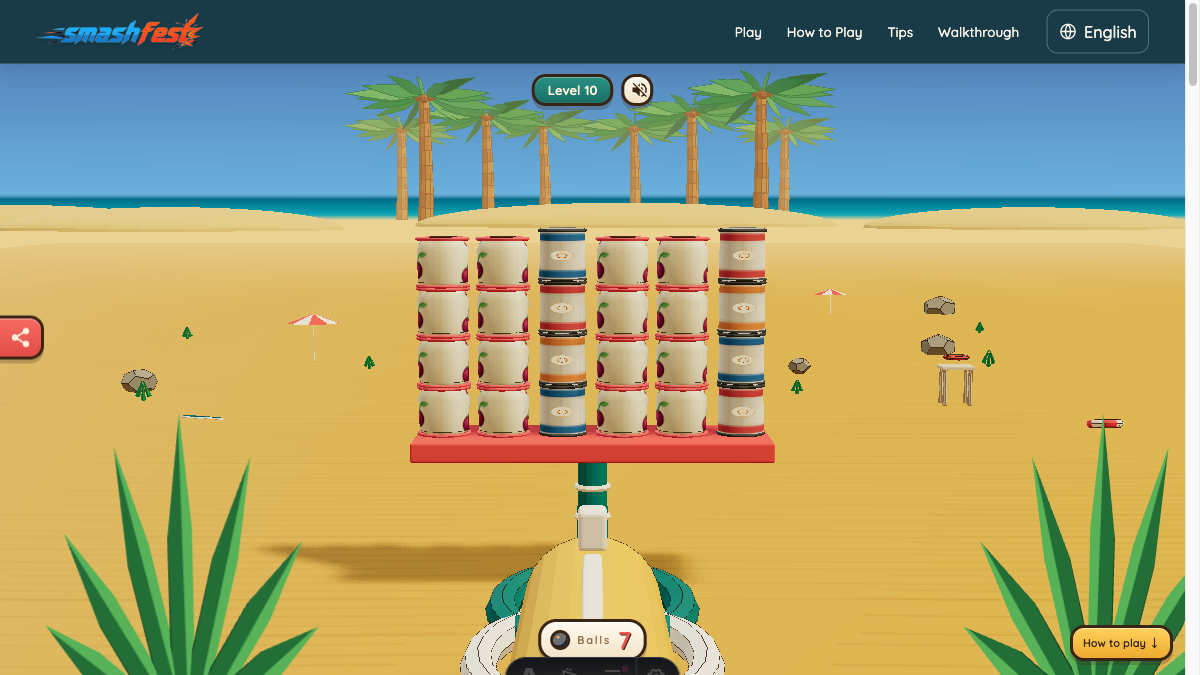
Level 10 closes Chapter 1 with a wide wall of 24 glass and tin objectives arranged across six columns and four rows. You receive seven cannonballs and a par target of four. The explicit strategy is center, but the extra width and height mean a successful center opening must be followed by patient left-right decisions rather than repeated shots into the same gap.
This level combines the wall lessons from Levels 1, 2, and 6. Glass can break during direct and secondary contacts. Tin must leave the platform. Four rows provide useful falling energy, while six columns can leave stable shoulders after the middle opens. The four-shot plan assigns one shot to the center, one to each strong side if necessary, and one to final material-aware cleanup.
Cannonballs
7Materials
Glass · TinPar
4Targets
24Map the six-column Chapter 1 wall
The wall spans almost six world units and rises above four. Its lower row supports three rows of mixed objectives, and its central columns connect large left and right sections. The formation is broad enough that one opening may not reach both outer shoulders, but a low central gap still removes the most shared support with the first ball.
Before firing, identify the middle and the nearest open edge on each side. After the center moves, treat the remaining left and right shapes independently. Some glass may already be gone, and some tin may have moved to new positions. The original six-column map becomes less useful than the stable contacts visible after each settle.
Opening plan: split the wall before cleaning it
Aim at a lower target in one of the two central columns. A line slightly toward open space can break glass and push tin while opening support above. Avoid the top center: it may create visible damage without splitting the lower wall into manageable sections.
Wait through the four-row fall. When stable, compare the two shoulders. Use shot two on the denser or taller stable side, aiming at its lower inner edge so movement travels outward. Reassess again before deciding whether shot three belongs to the opposite side or a central pile.
Step-by-step Level 10 plan
Split the lower center
Place the first shot on a bottom target in a central column. Let the ball open a gap and allow upper glass and tin to descend through it.
Clear the stronger shoulder
After all four rows settle, aim at the lower inner support of the side with more stable objectives. Push that group toward its nearest open edge.
Resolve the opposite side or central pile
Choose shot three from the new layout. Attack the other stable shoulder if it remains tall; otherwise direct a compact tin pile outward.
Use shot four as precise cleanup
Break isolated glass with a centered contact or drive the final tin target off the platform. Confirm the objective counter after a complete settle.
Why the four-shot plan fits the Chapter 1 finale
A low center shot affects the wall's most connected support area and uses four rows of height to create secondary contacts. Splitting first reduces a 24-target problem into smaller shapes with obvious edge directions. Each later shot then has a defined structural purpose instead of adding random force to the full wall.
The plan also respects the material mix. Glass can reduce the objective count during the collapse, while tin may become the last grounded remnant. Delaying cleanup until after both shoulders move lets gravity and glass breakage simplify the level before you spend a ball on an individual target.
Alternative when one side stays attached to the center
If the opening creates only a narrow crack and one shoulder remains connected to a central base, use shot two on the lowest contact bridging that side to the middle. Do not waste the shot on its outer top. Once the connection moves, wait for the side to separate before returning to the other half of the wall.
Common Level 10 mistakes
Opening too high
Upper damage looks useful but leaves the six-column base able to support broad stable shoulders.
Repeating center shots
Once the gap exists, aim at the stable side contacts. More balls through empty center space add little value.
Cleaning one target before the wall settles
Four rows can generate late glass breaks and tin movement. Premature cleanup spends the limited four-shot plan.
Level 10 replay checklist
- The first shot split the lower center rather than the top rows.
- The full four-row fall settled before side selection.
- Shots two and three addressed stable structural zones.
- Shot four was reserved for a verified final material condition.
- No navigation or plan assumed an unpublished Level 11 guide.
Continue learning
Replay Level 10 from the browser game, then compare the result with the material and support principles in the related guides. Physics can settle differently after small aim changes, so use the visible target count as the final check.